Last updated October 15, 2026
Home Addition Contractor Maintenance Checklist for Long Beach Homeowners
The most expensive repair call a Home Addition Contractor services gets isn’t rot or foundation settling. It’s water intrusion at the roof-to-existing-wall connection that went uninspected for two years because the homeowner assumed the addition was “new and fine.” In Long Beach, where salt air and marine-layer humidity work on building materials year-round, that assumption costs homeowners thousands. This guide is organized by joint, not by season, because the failure points on a home addition are almost always at the seam where new construction meets old. You’ll learn exactly what to inspect, when to inspect it, and what a problem looks like before it becomes a five-figure repair.
Quick Answer
A home addition in Long Beach needs inspection at least twice a year, focused on the seams where new construction connects to the original house: roof flashing, shared walls, caulked expansion joints, electrical sub-panel connections, and HVAC duct transitions. For Seasonal ADU Care for Long Beach: Year-Round Homeowner’s Guide on timing these checks, see our related resource. The marine climate accelerates degradation at these junctions faster than inland locations, so a 30-minute visual check every spring and fall, plus photo documentation at 6, 12, and 24 months after completion, catches most failures before they require major repair.
Table of Contents
- Roof Flashing at the Addition-to-Existing-Wall Connection
- Caulked Expansion Joints and Salt Air Degradation
- Sill Plates and the Shared Wall Assembly
- Reading Your Electrical Panel After an Addition
- HVAC Duct Connections and Long Beach Humidity
- Grading and Drainage Around New Foundation Footings
- Documentation Protocol: Your Warranty Paper Trail
- Common Mistakes to Avoid
- When to Call a Professional
- Frequently Asked Questions
Roof Flashing at the Addition-to-Existing-Wall Connection
The single most vulnerable point on any home addition is where the new roof ties into the existing wall. Flashing, which is the metal or membrane material that directs water away from that junction, gets worked constantly by thermal expansion, wind, and in Long Beach specifically, salt-laden air that accelerates corrosion on metal components. We’ve opened up walls on additions less than five years old in Naples and Belmont Shore and found rusted step flashing that looked twenty years old.
What to check, in order:
- Look for lifted or curled flashing edges along the entire length where the addition roof meets the original wall. Even a quarter-inch lift allows capillary water intrusion.
- Check for rust staining on painted surfaces below the junction. Rust streaks mean the flashing is corroding and losing its water-shedding ability.
- Inspect the counterflashing, the piece set into the existing wall that overlaps the step flashing. If caulk at the top edge has separated, water gets behind it.
- Look for cracked or missing sealant at any roof penetration near the junction: vent pipes, exhaust fans, or skylights installed as part of the addition.
If you see daylight through any gap at the seam, or if water stains appear on interior ceilings near the addition wall after rain, the flashing has already failed. Don’t wait. Water that runs behind flashing travels down the wall cavity and rots the structural framing silently. In older Long Beach neighborhoods like Alamitos Heights and Los Altos, where original homes date to the 1950s and 1960s, the existing wall sheathing is often more susceptible to water damage than the new construction.
For homeowners planning a home addition in Long Beach, insist on stainless steel or copper flashing at this junction, not galvanized. The salt air difference is measurable, and the upgrade typically adds less than $800 to the overall project.
Caulked Expansion Joints and Salt Air Degradation
Every home addition has expansion joints, which are deliberate gaps that allow the new structure and the original structure to move independently without cracking. These joints get filled with a flexible sealant, and that sealant is the most maintenance-intensive material on your addition. In Long Beach’s coastal environment, exterior sealant life runs 3 to 7 years, compared to 8 to 12 years inland. The combination of UV exposure, salt deposition, and humidity cycling breaks down the polymer bonds faster.
You’ll find expansion joints at:
- The vertical seam where an added room’s wall meets the original exterior wall
- The joint between the addition’s concrete patio or walkway and the original foundation stem wall
- Window and door perimeters on the addition, especially on the ocean-facing side
- Where the addition’s roofline intersects with the existing fascia or eave line
Inspection protocol: Run your finger along each sealant line. Properly functioning sealant feels slightly rubbery and flexes without cracking. If it feels hard, brittle, or crumbles when pressed, it’s failed and needs removal and replacement. Look for hairline separations between the sealant and either surface it’s supposed to bond to. A sealant that has pulled away from one side looks intact but does nothing.
The failure mode we see most often is what we call “hidden channeling.” The sealant looks fine on the surface but has separated underneath, creating a channel that funnels water directly into the joint. The only reliable test, and one every homeowner can do, is to run a thin, rigid piece of plastic along the sealant edge. If it slides into a gap, the joint has failed even though it looks sealed.
Recaulking expansion joints on a typical 400-square-foot room addition in Long Beach costs between $400 and $900, depending on linear footage and accessibility. Doing it before water intrudes saves structural repair that starts at $4,000 and climbs from there.
Sill Plates and the Shared Wall Assembly
The sill plate is the piece of pressure-treated lumber that sits directly on top of the concrete foundation and anchors the addition’s wall framing. On an addition, there are actually two sill plate zones to monitor: the new sill plate on the addition’s foundation, and the original sill plate where the addition ties to the existing home. That original sill plate was never designed to be an exterior connection point, and once a room addition encloses against it, it becomes vulnerable to moisture it never faced before.
In Long Beach’s soil conditions, which include expansive clay in areas east of the 405 and sandy loam closer to the coast, foundation movement works the sill plate connection continuously. The inspection points:
- From the exterior, look for any gap between the bottom of the siding and the top of the foundation on the addition. A gap wider than 1/8 inch signals settling or sill plate compression.
- From the interior, if the addition has a crawl space or accessible framing, check for water staining on the sill plate. Dark staining with a white crystalline residue indicates termite activity, which is active year-round in Long Beach.
- Check the anchor bolts. If you can access the sill plate from a crawl space, confirm the nuts on the anchor bolts are snug. A loose connection lets the wall rack during seismic events.
- On the shared wall where the addition meets the original structure, look for cracked drywall or separated baseboards that indicate differential movement between the two structures.
One thing unique to additions rather than original construction: the shared wall becomes an interior wall on one side and an assembly that carries moisture in ways the original builder never anticipated. If you converted a garage or added onto a wall that was formerly an exterior wall, that wall now has a conditioned space on both sides, which changes how it dries. Condensation inside that cavity is silent and destructive. If you smell mustiness near the shared wall or see paint bubbling low on that wall, call a room addition contractor in Long Beach for an invasive inspection sooner rather than later.
Reading Your Electrical Panel After an Addition
When a home addition is built, your electrical system gets modified in one of two ways: either the original panel gets new circuits added, or a sub-panel gets installed in the addition that feeds off the main panel. Both configurations have a specific failure signature that shows up as a voltage drop, and you can spot the early warning yourself without touching a single wire.
The symptom to look for: lights in the addition that dim briefly when a large appliance cycles on, combined with a warm faceplate on the sub-panel or the main panel. In Long Beach, where many homes still have 100-amp panels from their original construction, adding a room with a bathroom, home office equipment, and a mini-split HVAC system pushes the load calculation close to capacity. A sub-panel connection that was sized correctly at installation can develop voltage drop if the connection terminals loosen over time, which happens more quickly in environments with humidity cycling.
Here’s how to read your panel after an addition:
- Identify whether you have a sub-panel in the addition. It will be a smaller breaker box, often in a closet or garage area of the new space.
- Check the breaker map inside both panels. The sub-panel should have a clearly marked feeder breaker in the main panel, typically 60 to 100 amps depending on the addition’s load.
- Once a month for the first six months, place your hand flat against the sub-panel cover. It should feel room temperature. Any warmth means resistance at a connection, which is the precursor to voltage drop and, eventually, burned terminals.
- Turn on everything in the addition, including space heaters if you have them, and watch the lights. If they flicker when the refrigerator or AC compressor starts, call an electrician. Intermittent dimming is not normal on a correctly sized and connected sub-panel.
Safety note: Do not remove the panel cover. The main lugs in a panel remain energized even with the main breaker off, and a misstep with a metal tool can cause a fatal arc flash. If you feel warmth at the panel, see flickering under load, or notice any scorch marks around breaker terminals, call a licensed electrician. This is not a DIY diagnosis.
At the time of installation, a Long Beach ADU builder should provide a load calculation worksheet showing the designed amperage for the addition. Keep it. It’s your baseline to compare against if an electrician ever tells you the panel is undersized.
HVAC Duct Connections and Long Beach Humidity
The HVAC transition is the most overlooked maintenance point on a home addition, and in Long Beach it’s the one that causes the most silent damage. The specific problem is condensation at the point where the original ductwork connects to the new ductwork. Long Beach’s humidity swings between marine-layer mornings that push relative humidity above 85% and warm afternoons that dry things to 60% or below. Every swing puts moisture into the air inside your walls, and the cold duct surface becomes a condensation collector.
What happens next is predictable: water forms on the outside of the duct at the connection, drips onto whatever is below it, usually ceiling drywall or attic insulation, and the damage accumulates slowly enough that you don’t notice until staining appears or mold develops.
Inspection steps:
- Locate the duct transition, which is typically in the attic or crawl space directly above or below the junction between the original home and the addition. Look for a metal collar or taped seam connecting two different duct sizes.
- Check for water staining on the duct insulation at that junction. Fiberglass duct wrap that has absorbed water feels heavier and shows a darker color.
- Look for condensation on any exposed metal at the connection during the morning hours, before the air warms up. That’s the peak condensation window for Long Beach’s marine layer.
- Inside the addition, check the ceiling registers. Rust on register screws or water rings around the register suggest condensation inside the duct run, not just at the connection.
If you’re adding a room with its own mini-split system, the condensation concern shifts to the unit itself and its drain line. The drain line collects condensation and routes it outside, and in Long Beach’s climate it can clog with algal growth within a single season. Pour a cup of water into the drain pan and watch how quickly it drains. If it pools, the line is restricted. A clogged mini-split drain line overflows into the addition’s drywall, and that repair typically costs between $1,200 and $2,500 depending on the finish damage.
Grading and Drainage Around New Foundation Footings
New construction settles. That’s expected. What matters is whether it settles evenly, and in Long Beach’s soil profile, which varies block by block, the first 18 months after completion are when problems announce themselves. The soil profile matters: homes near the Los Angeles River and the former wetland areas, including parts of North Long Beach and West Long Beach, sit on soils with higher clay content that expand and contract more aggressively with moisture than the sandy soils nearer the coast.
The inspection is simple but specific:
- Walk the perimeter of the addition after rain and look for water pooling within 10 feet of the foundation. Pooling that persists 24 hours after rain stops indicates a drainage problem that will get worse as the soil expands and contracts through wet-dry cycles.
- Check the soil level against the foundation. Building code requires a minimum 6-inch fall in the first 10 feet away from the foundation. If the soil has settled and that fall has flattened or reversed, you now have water running toward the foundation.
- Look for separation between soil and foundation. A visible gap of more than 1/4 inch indicates soil shrinkage, which is normal in dry months but creates a channel for water to run directly to the footing when rain returns.
- Inspect the downspout discharge from any gutter on the addition. The discharge should terminate at least 5 feet from the foundation. If the addition’s roofline changed the drainage pattern and concentrate water at a new point, that point needs a splash block or an extension.
Fixing drainage around a home addition in Long Beach typically costs between $1,500 and $4,000 for regrading and drainage improvements, which is a fraction of the $15,000 to $40,000 foundation repair that results from ignored drainage problems. The window to catch it is that first 18 months, which is why the documentation protocol below matters.
Documentation Protocol: Your Warranty Paper Trail
Photographing your addition’s junction points at 6, 12, and 24 months after completion is not busywork. It’s the difference between a warranty claim that gets resolved in weeks and one that turns into a months-long dispute over causation. The 365-Day Done Right Promise that Sutton ADU Long Beach provides covers defects in workmanship for one full calendar year from project completion, and a photo trail that shows the condition of the work at 6 months and 12 months makes any claim straightforward. It also protects you if a problem emerges after warranty coverage ends and the question becomes whether the issue existed during the warranty period.
The documentation protocol:
- At 6 months: photograph every junction point, including exterior flashing, expansion joints, sill plates, panel faces, and duct transitions. Use your phone, but stand at the same distance and angle each time. These photos establish the baseline condition.
- At 12 months: repeat the same photos. Compare them side by side with the 6-month photos. Look for changed conditions, not just obvious failures. A hairline crack in sealant at 12 months that wasn’t visible at 6 months tells you the material is failing.
- At 24 months: repeat again. This set of photos matters because it comes after the typical 1-year workmanship warranty expires. If you can show that a condition existed at 12 months and worsened by 24, you have a much stronger case for a covered repair.
- Store all photos with date stamps and location notes. Cloud storage with a dedicated folder works. Do not rely on your phone’s camera roll alone.
The photographic record also helps any contractor who comes to diagnose a problem. When we arrive for a Sutton ADU Long Beach home inspection and the homeowner has a documented history of the junction points, we can often identify the failure mechanism before opening a single wall. That saves diagnostic time and invasive demolition.
Common Mistakes to Avoid
- Treating the addition as “new and fine.” New construction means the warranty clock is running, not that nothing can fail. The first year is when installation defects reveal themselves. In Long Beach, that timeline compresses by roughly 30% due to environmental exposure.
- Inspecting seasonally instead of by joint. A seasonal checklist that says “check the roof in fall” misses the point that the roof flashing on your addition needs checking after specific events: heavy rain, Santa Ana wind events, or any seismic activity.
- Ignoring the shared wall because it’s interior. The shared wall between original home and addition carries moisture loads that no other interior wall does. Mustiness or paint bubbling there is a warning sign, not a cosmetic issue.
- Skipping the electrical panel check. Most homeowners never place a hand on their sub-panel after installation. Warmth is the earliest detectable sign of a failing connection, and it costs nothing to check.
- Deferring sealant replacement. Sealant is a consumable material with a known lifespan. In Long Beach’s environment, that lifespan is on the short end of the manufacturer’s range. Replacing sealant at first sign of hardening costs hundreds; replacing rotted framing costs thousands.
- Documenting only problems. Photographing only when something looks wrong means you have no baseline to compare against. The 6-month photo set is the most valuable documentation you’ll create, even when everything looks perfect.
- Assuming drainage problems are the original builder’s fault. In Long Beach, winter rains can saturate soils to depths that create settlement independent of construction quality. If you see drainage issues, address them regardless of causation. The repair cost is yours either way.
When to Call a Professional
Some inspection findings are informational; others demand professional intervention. Call a contractor immediately if you see water staining on any interior ceiling or wall adjacent to the addition’s junction points, if the sub-panel feels warm to the touch at any time, if doors or windows in the addition stop latching smoothly, or if you find active termite activity anywhere on the sill plate. Also call if your own inspection reveals a condition you don’t understand. Sutton ADU Long Beach offers free estimates in Long Beach, and an inspection by someone who has built additions on this exact soil profile costs you nothing. If you’re planning a new project, read our How to Hire a ADU Contractor in Long Beach: A Step-by-Step Guide first. Call (562) 317-7042 to schedule.
Frequently Asked Questions
Inspect your home addition twice a year, once in early spring after the rainy season and once in early fall before winter weather arrives. Long Beach’s marine layer means even the dry months carry enough humidity to affect sealant and flashing, so two inspections per year is the minimum that catches problems before they compound. Call (562) 317-7042 if an inspection turns up anything you can’t identify.
A visual inspection by a qualified contractor typically costs between $150 and $400 in Long Beach, though many firms, including Sutton ADU Long Beach, apply the inspection fee toward repair work if any is needed. Recalking expansion joints on a typical addition runs $400 to $900, and flashing repair at the roof-to-wall connection runs $800 to $2,000 depending on access and extent. For an exact quote, call (562) 317-7042.
Galvanized steel flashing in Long Beach’s salt-air environment lasts 5 to 10 years before significant corrosion appears; stainless steel or copper flashing lasts 20 years or more. If your addition was built with galvanized flashing, the 5-year inspection window is when you should plan for replacement rather than waiting for failure. The roof-to-wall connection is the highest-risk junction on the entire addition.
A workmanship warranty like the 365-Day Done Right Promise covers defects in the original work, not normal wear and tear on maintenance items like sealant and flashing. However, if sealant fails within the warranty period because it was installed incorrectly, that is a workmanship issue, not a maintenance issue. Photographic documentation at 6 months and 12 months is what proves which category a problem falls into.
Finger-width cracks in the addition’s stucco or drywall that appear during the first dry season after construction, doors or windows in the addition that stick or won’t latch, visible gaps between soil and foundation, and interior floor slopes of more than 1/4 inch over 8 feet all indicate potential foundation settlement. Long Beach’s clay-rich soils in many neighborhoods make differential settlement more common than in coastal sandy soils. If you’re seeing these signs, call (562) 317-7042 for an assessment.
Routine maintenance like recaulking expansion joints, replacing flashing, or adjusting drainage does not require a building permit in Long Beach. Repairs that involve structural modification, electrical work, or changes to the building envelope, such as replacing sections of wall sheathing, generally do require a permit. If you’re unsure whether a planned repair crosses that line, call the Long Beach Development Services department or ask your contractor before work begins.
The Bottom Line
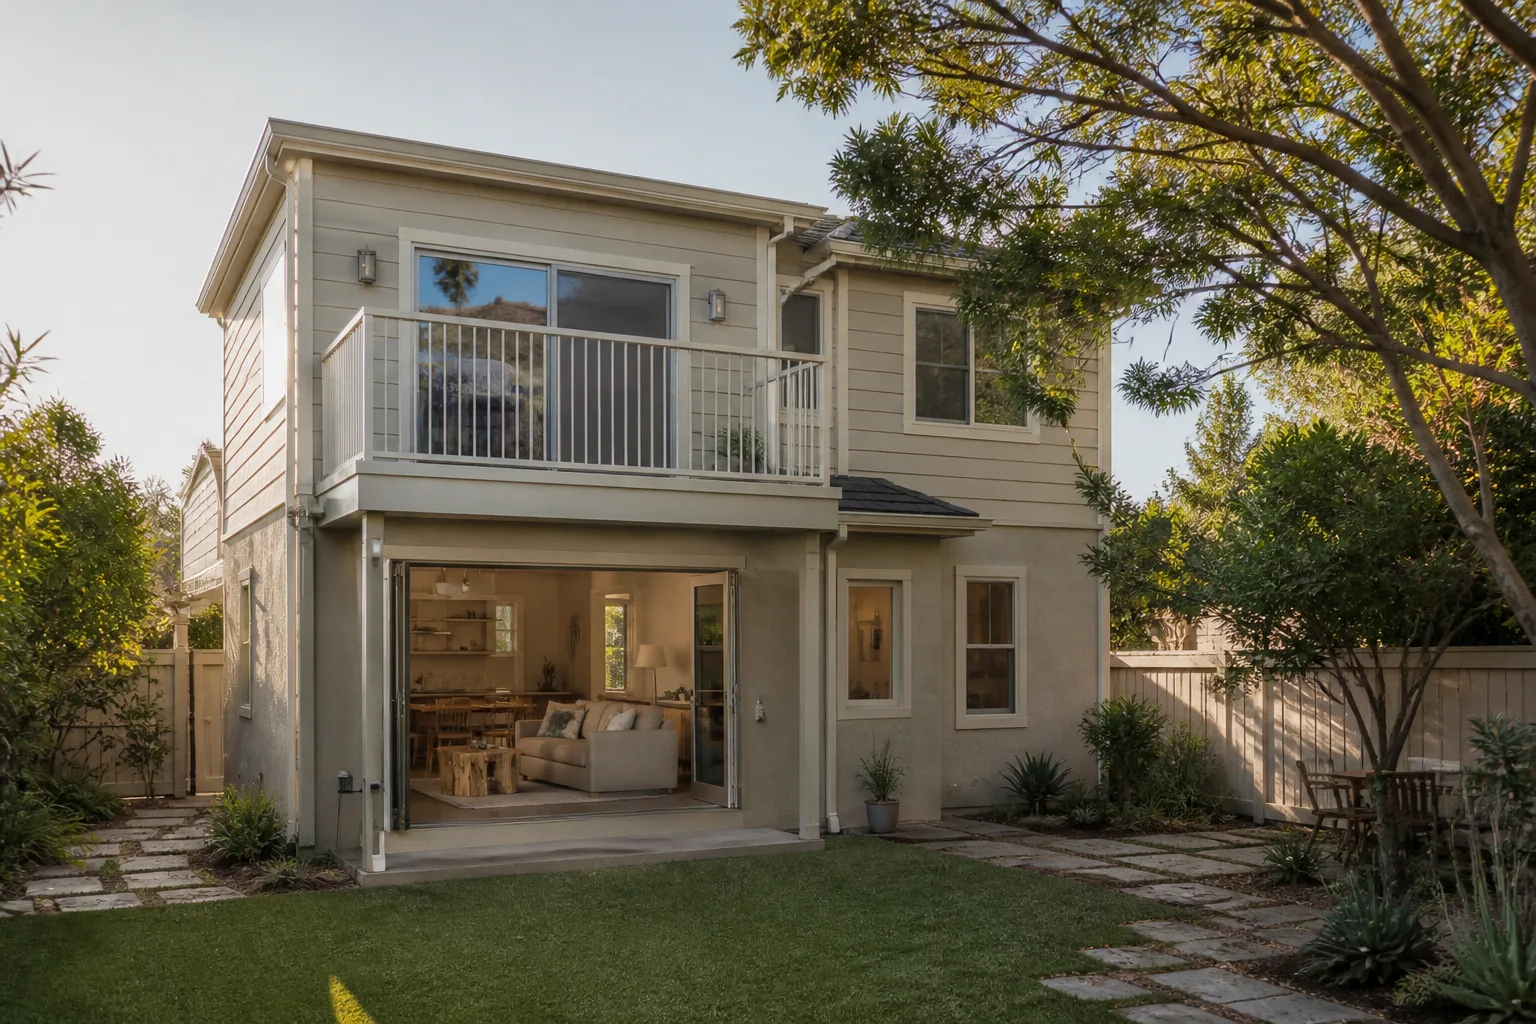
Your home addition is not a finished product that stays finished. It’s an assembly of joints that live at the intersection of two different structures, two different ages of construction, and one demanding coastal climate. The homeowners who get the most life out of their additions in Long Beach are the ones who inspect the seams, photograph the evidence, and act on small problems before they become structural ones. The checklist above costs you two hours per year and a few dozen photographs. Explore our more guides & resources for year-round maintenance strategies. In return, you get the full service life from your addition instead of discovering at year five that water has been working its way through the flashing since year two. That’s the trade, and it’s an easy one.
Written by Miles Hartwell, Owner at Sutton ADU Long Beach, serving Long Beach since 2006.